Vision:
trees dont grow into the heavens, plant new before the old fall over.
Mission:
we share our direction, you find your way.
Index
bread
cart
compost tea
compost toilet
garage
grainmill
green house
hearth
heating
HTML
kimchi
permaculture
rain catchin
site selection
solar dryer
solar PV
strawbale
thoughts
weeds
Bread
Bread starter (make once, lasts many years)
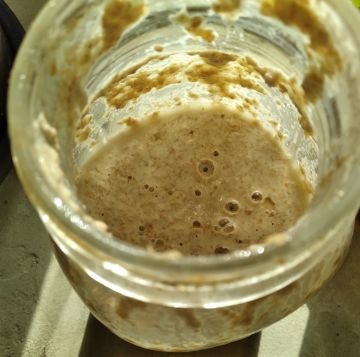
Combine 1 cup of flour with 1/3 cup of water in a jar. Cover and keep overnight.
Feed sour starter with 2 tablespoon of flour and 1 tablespoon of water daily.
The sour starter will be ready to use to make bread after 5 days.
Continue to feed the starter daily, replenish flour and water in a 3:1 ratio.
The starter is ready when it gets bubbly.
Notes:
- when it turns sour, the colony it is starving: replenish more.
- when using small amounts, keep it refrigerated to slowdown the process.
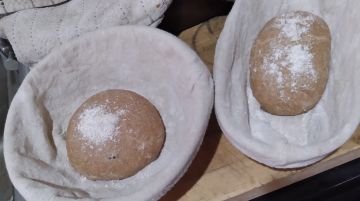
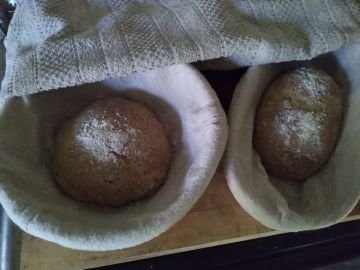
Our recipe to make bread:
Mix 1/2 cup starter, 2 cups flower, 1/2 cup water, 1 tablespoon honey.
Stretch for 5 minutes, let it rise under a (moist) rag for 6 hours. Bake at 230C (450F).
Notes:
- warmth and sugar help rising, salt pushes it back
- can add e.g. raisins, nuts, ginger, seeds, herbs, salt on top,
- score top of bread before baking to avoid cracking.
- find your local organic grain in bulk for economy
back to index
Cart
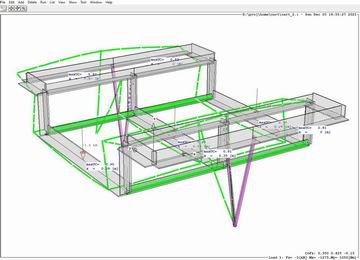
Utility cart: stable (floor below axels) and easy roll (big wheels)
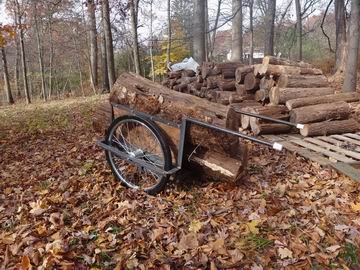
check strength before welding
back to index
compost tea
Compost tea: feed the inoculated brew with molasses and mix with air
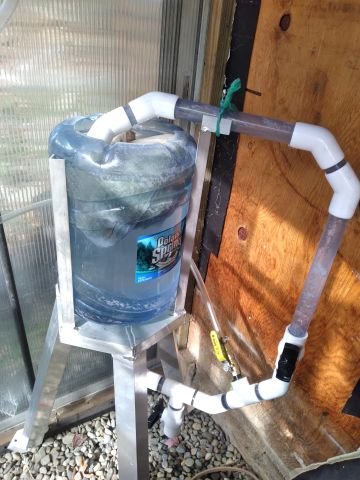
video (Click to play}
This way you can increase certain aerobic microbes.
Another option is to use leaf mold, let is ferment anaerobic, see JADAM organic farming.
We will update results when we have proof of concept.
back to index
Compost toilet
Yes wee can flush for free
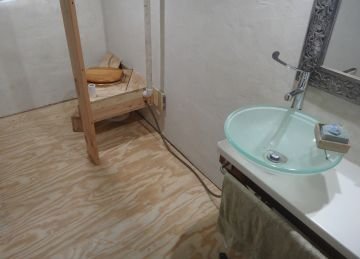
Sink washing water flushes the liquid gold (dilute nitrogen)
which is then drained with graywater to trees
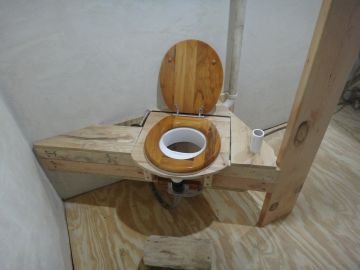
Add e.g sawdust to the humanure (carbon balances nitrogen)
ready to return to feed the soil (trenched and covered)
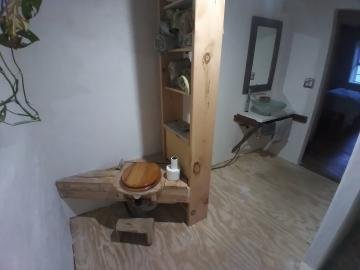
Sassafras floor boards from backyard (linseed oiled, drainholes under just in case)

Shower with thinset pan (waterproof fiber tile cement).
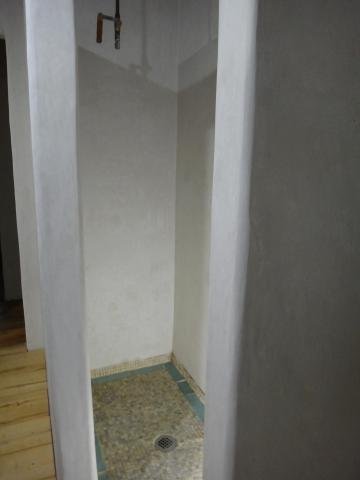
Water temperature is regulated with a thermo valve that is placed above ceiling beams to avoid penetrating in the plaster wall
A bench will be added to hide the drain line
Alternative: see Treebog on wikipedia
Interesting reads:
The humanure handbook by Joseph Jenkins
Liquid gold- the lore and logic or using urine to grow plants by Carol Steinfeld
(see also: www.liquidgoldbook.com)
back to index
Garage
Was not insulated. Now with greenhouse south and tunnel north side
it pays to have insulated doors. Made some with triple layer polycarb outside and double inside.
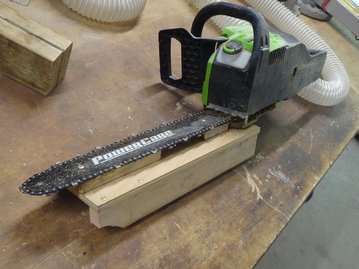
used an electric chainsaw
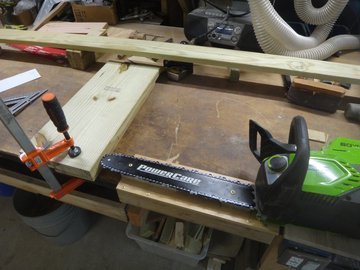
to make plunge cuts

make a panel
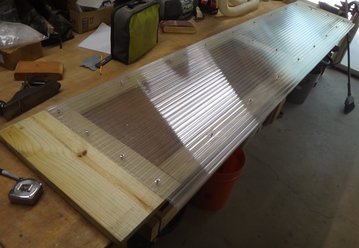
overlap polycarb to next panel to guide rain out and reduce draft
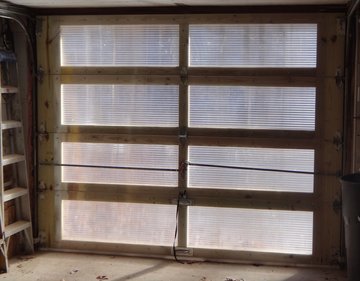
get some morning sunlight and warmth
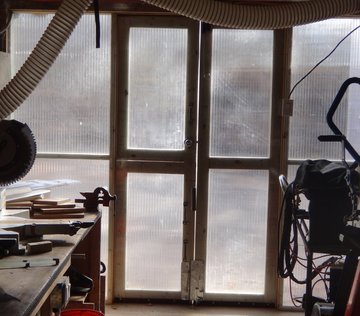
replaced overhead door by walking (half)door
back to index
Grainmill
To make flower for bread, oats, pizza etc.
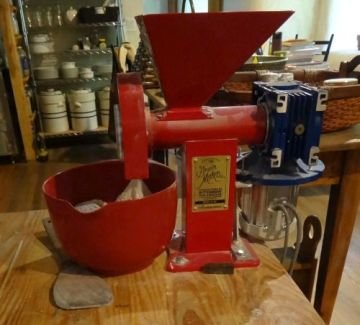
Added a sewing machine engine (750W), a 30:1 worm reduction
gear box and a 5 amp overload protection.
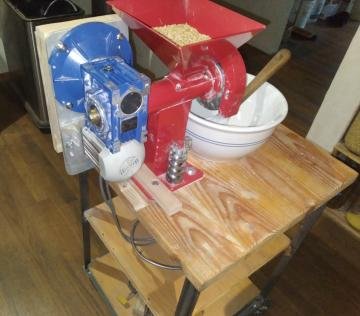
Added extra 2:1 belt reduction for milling corn
back to index
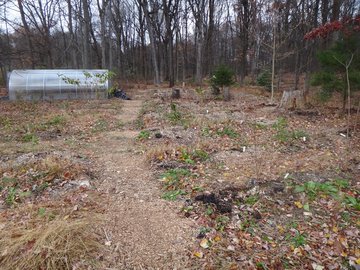
Greenhouse
Installed extra pours and columns to support existing overhanging roof.
breakout slab with frost rimm
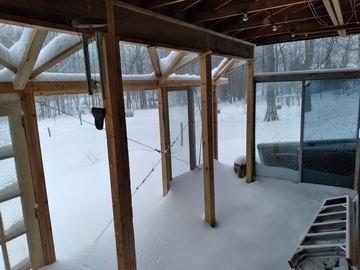
Made with old doors and windows. Added 1/4" polycarb sheets for better insulation.
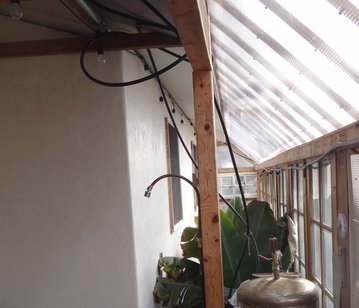
Banana tree and summer shower (for bathroom redo).
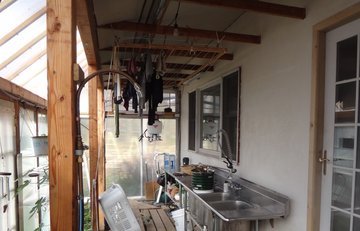
Serves as nursery and reduces cold in winter.
Clothes drying saves lotsa kWh, clean scent by aerobe airborne microbes.
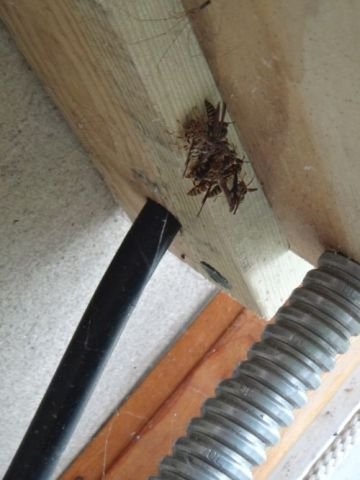
Wasps fulfilled their cycle, kept down aphids and more.
(under housing of old car battery that keeps the electric fence alive)
back to index
Hearth
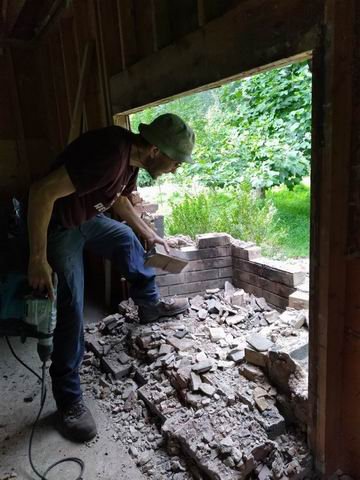
Removed old hearth (not efficient, the chimney settled caused leakage,
which invited wasps and ants in the decaying plywood) ..
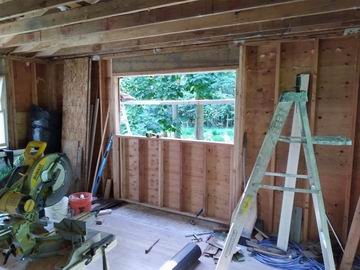
build back with old storm door as window..
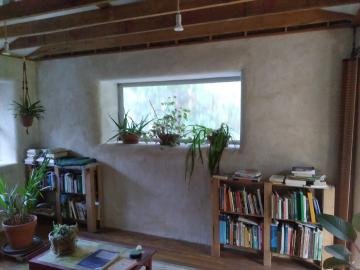
finished buck with strawbale and plaster.
back to index
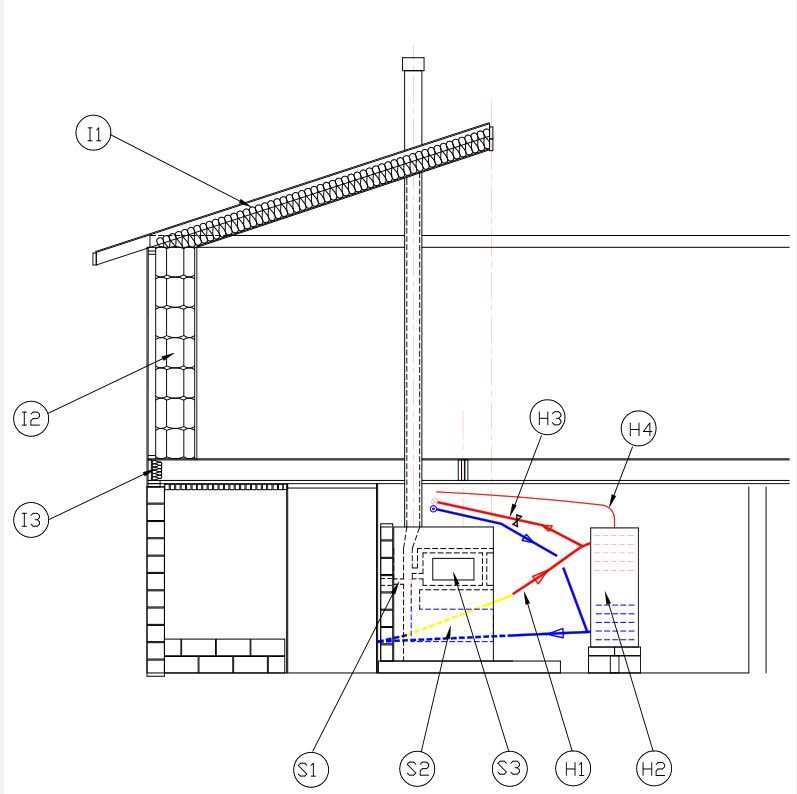
Heating
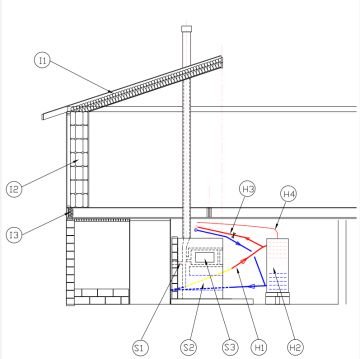
schematic (Click to enlarge}
I1: insulated roof (double beams, extra fiberglass (most reused from walls), closed eaves for mice
I2: strawbale insulation with vent gap (moved electrical and plumbing out), keep vent space
I3: insulated wooden ringbeam (wood insulates less than mason blocks)
6" chimney was reused from old burner (double wall Selkirk)
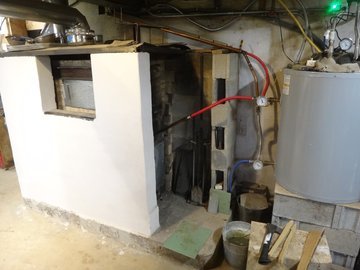
Stove is placed in basement central to the house for efficiency.
Heat to rooms over the garage is by a parallel 3/4" copper line (convection of hot water),
through reused heating element (3/4" copper pipe with aluminum cooling fins).
The pipe is placed parallel to the 3 central beams,
air moves by convection between the floor beams over the garage
(gentle radiant floor heating without water).
The copper lines allow safe passage of heat through a fire wall.
The floor heating also serves as a dump line for excess heat from the stove/boiler.
The space above the basement (kitchen etc) is warmed by radiant heat from the mason stove.
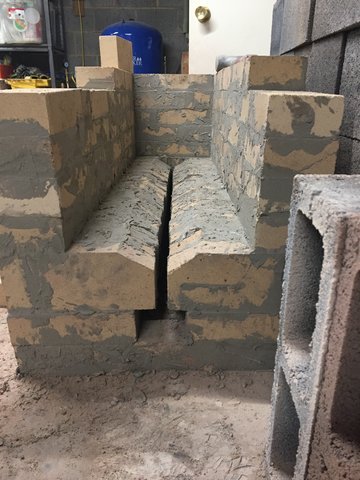
S1: brick choke to guide exhaust air around side pocket (S3) after startup
S2: hearth with double 3/4" copper pipe (yellow) to absorb heat
S3: side pocket for drying/cooking (e.g. bread 6 hours after cold start)
H1: heat from stove to hot water tank (3/4" pipe, free convection, no pump)
H2: hot water tank (hot water rises, cold water sinks)
H3: warmth from hot water tank to floor (3/4" pipe, radient heat, no pump)
Used copper pipe with aluminum fins from old baseboard heating.
The metal can handle heat, the air distributes between floor beams
(no plastic pipe, no drilling floor beams)
H4: hot water line 1/3" inside diameter feeds kitchen & bathroom
(faster flow: short lead time, less heat loss, cleaner line).
Some mason stove building pics:
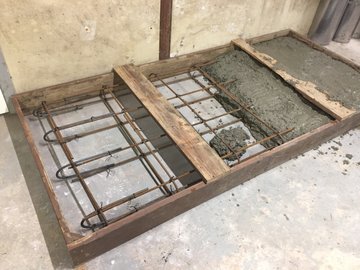
rebar in foundation slab
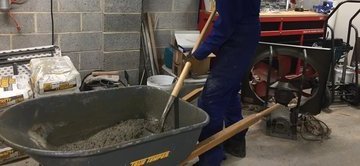
mixing concrete
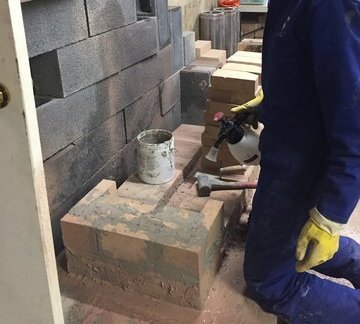
laying fire brick and cement (Heat stop 50-refractionary mortar)
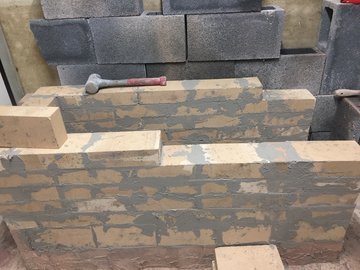
hearth
ash takeout & air intake
side pocket over hearth and tadelakt finish on masonblock wall
note free convection hot water flow from hearth to water tank
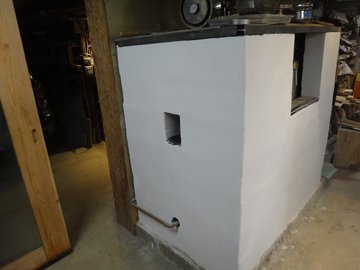
access to damper: balance flue temperature and heat around side pocket
(note below the cold water pipe entry to hearth)
Interesting reads:
The book of Masonry Stoves, Rediscovering an Old Way of Warming by David Lyle
Masonry Heaters, Designing, building and Living with a Piece of the Sun by Ken Matesz
back to index
HTML
A website can be made with HTML and is easy to maintain.
- use views that look good on smartphone but also on PC
- keep short loading times: downsize pics with e.g. IrfanView or GThumb
- HTML is easy on Search Engine Optimization (that helps you ranking)
- study HTMLisEasy.zip by Joe Bartha
- see our sample.htm for starters (view in editor & browser)
- find a provider that has good support, and allows simple html websites (e.g. hostinger)
back to index
Kimchi
Ingredients:
- 3 red cabbages
- 3 large carrots
- 3 pieces of ginger 2x3" each
- 8 medium-sized cloves of garlic
- 3/4 cup of salt
Time:
2-3 hours to make, minimum 3 weeks to ferment
(can be months: flavor gets stronger with age).
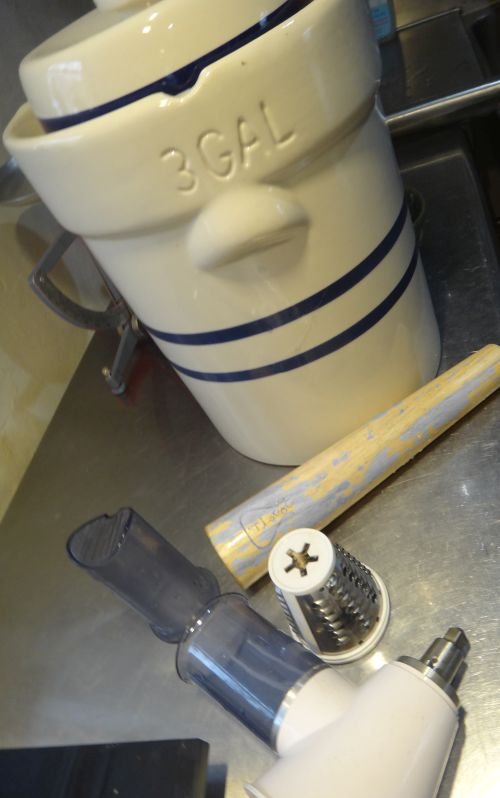
Tools: crock, tamper, grating bell for e.g. kitchenaid
Directions:
- Cut cabbages and carrots into chunks and grate them or slice thin.
- Dice the ginger and garlic fine.
- Mix the cabbage, carrots, ginger and garlic with 1/2 cup salt.
- Wet your hands with water and wipe them on the inside of the crock.
The goal is to wet the crock just enough to get some salt to stick to the bottom and insides.
Use the remaining ¼ cup of salt to wipe inside the crock. This is done to inhibit mold growth.
- Add the ingredients to the crock or jars.
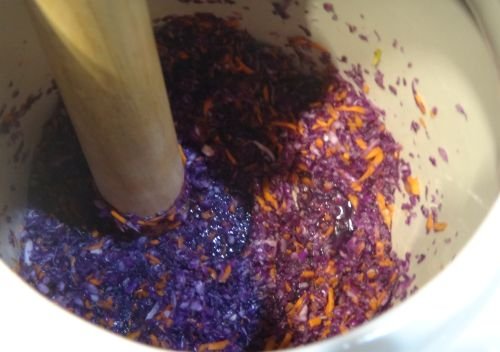
- Use the tamper to release the natural juices from the veggies.
Continue pressing until the juices rise just above the veggies.
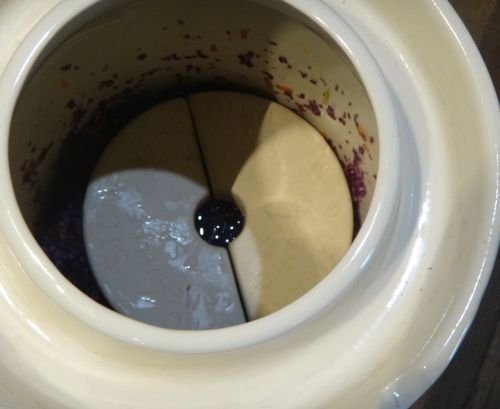
The crock may have a set of ceramic weights--wet and salt the weights and place them on the kraut.
- Put the lid on the crock or jars and keep in a cool place, out of direct sunlight for 3+ weeks.
- If you have a water seal crock, add water to the channel to seal the lid (Do Not add water to your kraut).
- Can serve this kraut with potato pirogi, fried rice, and sandwiches.
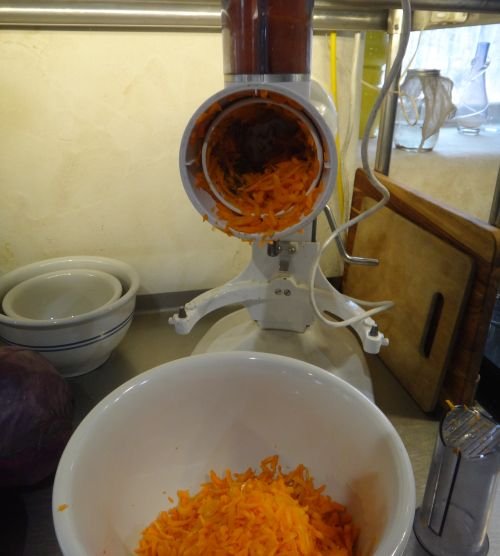
Grating carrots and cabbage (ginger and garlic easier to dice).

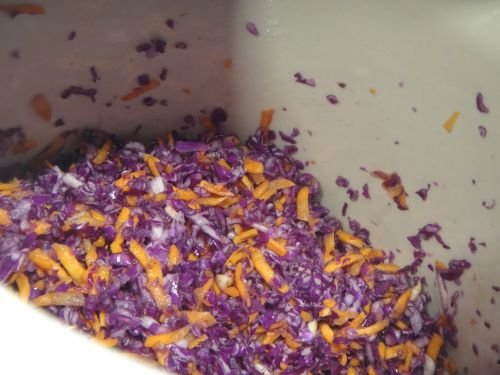
Grated cabbage and carorts with ginger/garlic. The ratio of carrots to cabbage is 1:4.
All ingredients can be mixed and tamped in the crock.
If you're using mason jars, mix the ingredients in a large container and divide into the jars with 2†of air space.
Tamp the ingredients in the jars until the veggie juices rise above the veggies.
Leave some air space at the top of the jar for fermentation activity.
Fermented foods like kraut and kimchi can also help heal gut micro biome.
Having fermented vegetables on hand is useful during the cold weather season, when fresh veggies are less available.
It is an easy source of vitamins A and C, fiber and anti-oxidants.
Variations can shift the flavor sweeter or spicier. The key is to select crunchy ingredients.
Apples or kohlrabi work well as an addition or as an ingredient replacement.
Colorful vegetables are an indicator of vitamins and nutrients.
This is a healthy and tasty way to add nutrition to your meals during cold months when fresh vegetables are less available.
Mix and tamp in crock.
back to index
Permaculture
We learned a lot from Josh Gomez (permaculture Kernow)
including: make a move when it serves multiple purposes.
Plenty of good websites:
- Michael Judd (paw paw etc)
- Joe Hollis (herbs)
Youtube videos:
- John D Liu: Regreening the desert (48min)
- Ron Finley: Guerrilla gardening South LA (11min)
- Russ Finch: Earth heated greenhouse in Nebraska (18min)
Books:
- Fukuoka: One straw revolution (simplify and work with nature)
- Brad Lancaster: Rainwater harvesting for drylands and beyond, Vol. 2
Some of our implementations:
- diverted backyard rainwater away from our house, slowing it down with mulch dams
- made terrasses (step down) in the front to retain water
- made swales on contour with chips and branches in the backyard to slowdown water and reduce erosion
with A-frame (weight), bunyip (water level tube) and outdoor laser
- occasionally added goat manure to balance the carbon from woodships
- use gray water to feed the trees
- apply covercrop
- use perennials
- catch roof runoff, see Rain catch
- use our compost for the land, reduce the septic tank load (only filled with gray water during frost)
- use PV for electric power, any surplus to make hot water (spring/summer/fall)
- use wood for cabinetry and heating (house and water) during winter
back to index
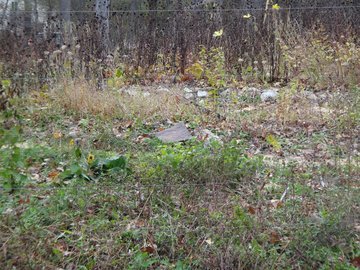
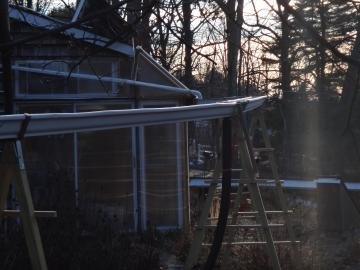
Rain catch
Gutters sloped about 1/8 inch per 2 feet (on the house).
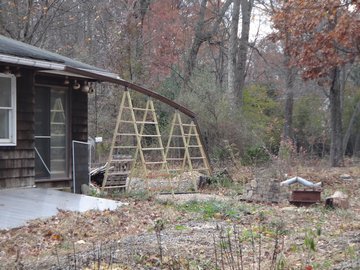
We made stainless brackets (1/2"*1/4" flatbar) to replace thru nails for easy cleaning.
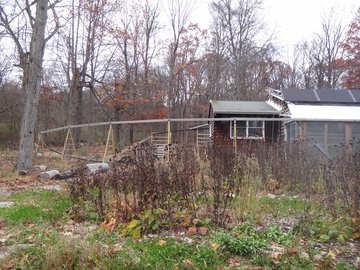
Used A-frames to support the gutter, with horizontal ties for vines
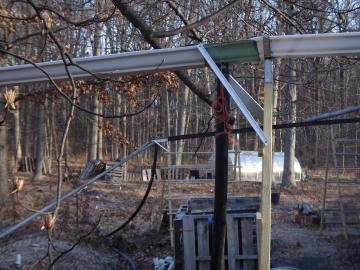
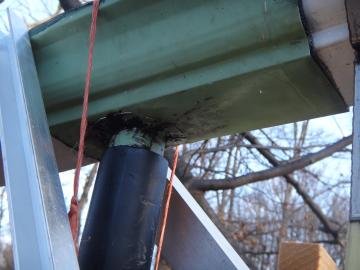
Gutter downspouts (almost horizontal, with old mosquito mesh) to redirect water to IBCs using 2" black pipe

Mesh covers the downspouts, starts under inlet side
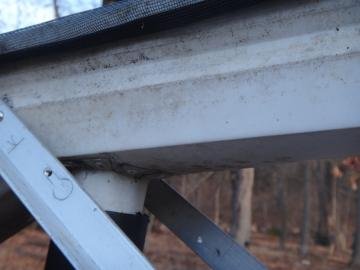
Gutter downspout made from old aluminum siding (thinner)/roofing (thicker).
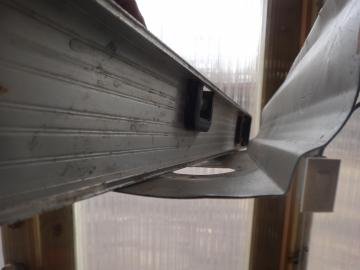
Hammered around the 2" hole to get a water collecting 'funnel' under the mesh
About 3/16" deep (~4mm)
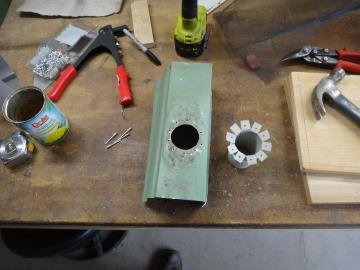
Ready to rivet and seal
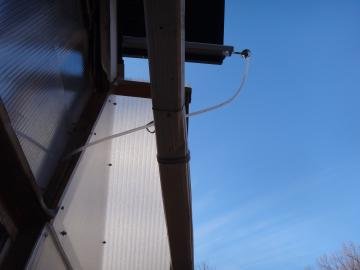
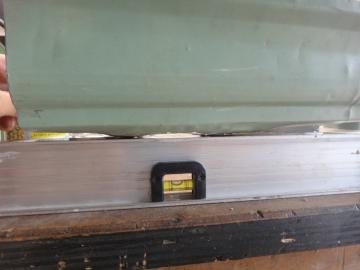
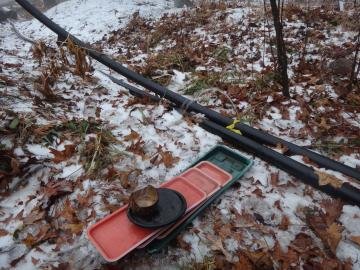
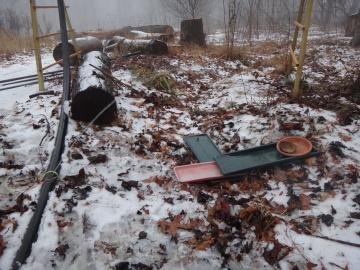
Frost proof rain meter: catch rain with funnel outside (mounted on PV rail),
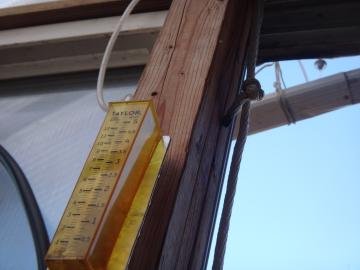
direct water with 1/4" tube to measure cup inside greenhouse (frost free).
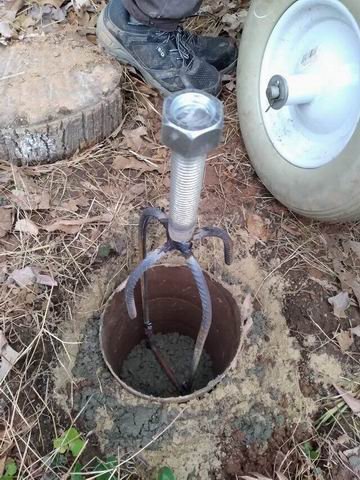
Some pics from digging:
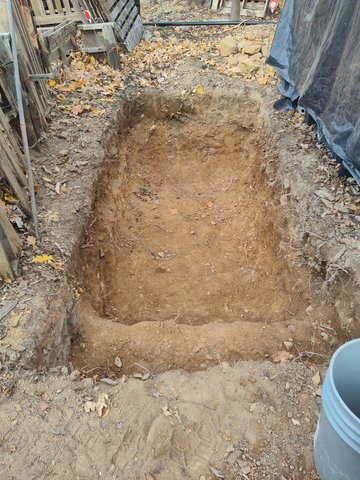
start digging, leave a step
more diggin
remove step
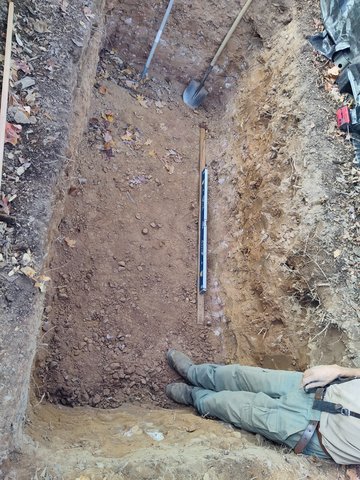
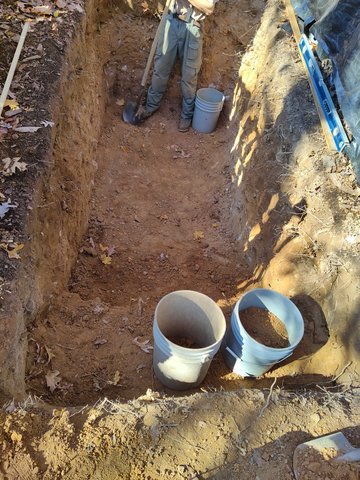
level floor
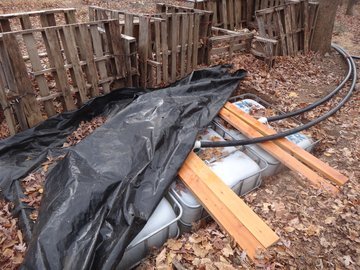
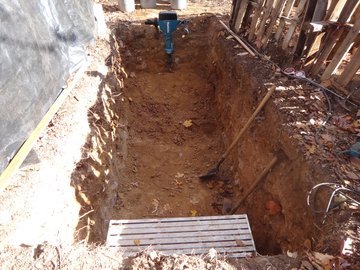
IBCs set in place, 2" elbow and more reused mosquito screen, cover with black against algae
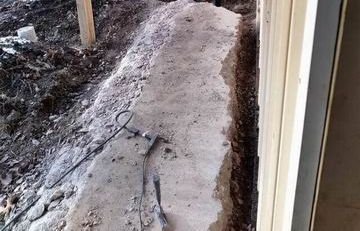
Weepholes to reduce frost damage to pipe
drilled 45 deg up fills birdbath for our neigbors (add pebbles to allow insect to drink safely)
back to index
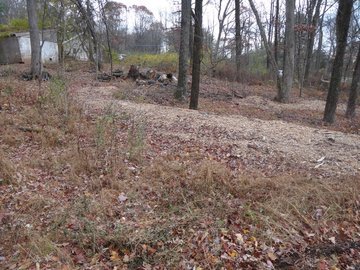
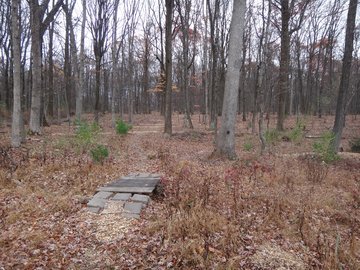
Site selection
When looking for a place, here are some considerations:
- sun: for growing and PV power (facing south/ get extra panels, pruning trees)
- water: well/ river (is it clean?), time shared access (basin water)
- lay of the land: hard to change (you can improve the soil though)
- access: yes some land is for sale without road access
- affordable: can you fix up while living there
- income: can you make a living, maybe grow some niche plants
(elderberry, mushroom etc.), process wood (mill, cabinetry)
back to index
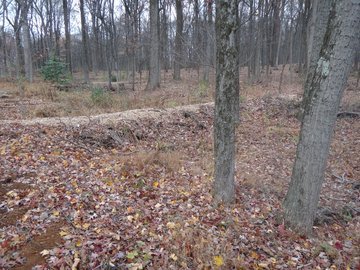
Soil
Understand your land:
- do a soil test, read the landscape from plants growing there
Retain water & reduce erosion:
- make swales on contour on sloped land: you can dig basins to make berms,
but it's easier to berm with e.g. woodchips and branches
- use cover crops and perennials that give fruit etc.
- laydown carton and cover with mulch to push back 'weeds'
Resilience by diversity:
- diverse vegetation helps pollinators throughout the year,
- healthy soil has diverse microbes/ fungi etc. that helps keep disease in check
back to index
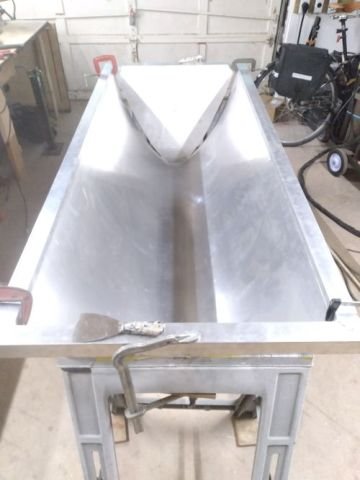
Solar dryer
Solar drying: reused storm door and channel profile for tripod

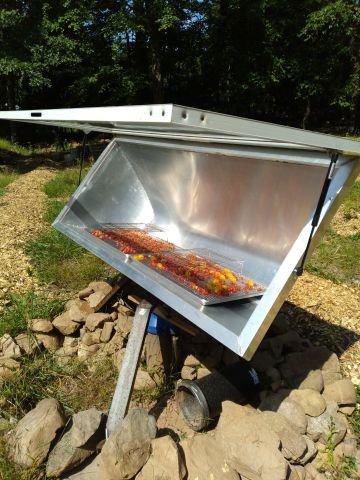
Fyi a spreadsheet
to match the 4'x8' plate to the stormdoor
Plate cut in progress
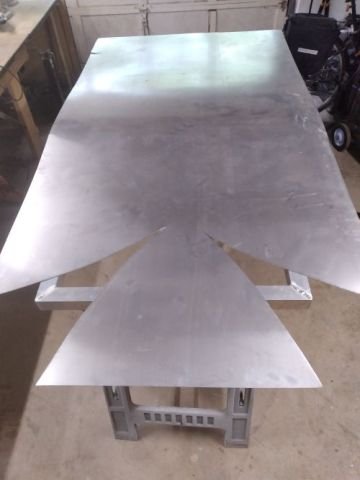
Tack to frame
back to index
Solar PV
Must and nice to have
Minimize your load, flex with the weather.
We removed airco and baseboard heating. Dry clothes on a line (in the attached greenhouse).
Insulated what we can (keep summer vents against moist).
Kept record of weekly kWh usage for a year, used the KillAWatt meter to identify culprits.
We do have a small size fridge and washing machine. No television.
Induction cook tops are efficient. Water gets heated by surplus solar energy (summers) and stove (winters).
Wiring
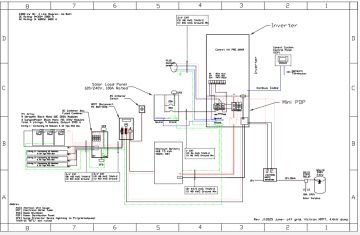
schematic (Click to enlarge}
The neutral is tied to ground in one location, to avoid loops.
External backup must be connected to the same neutral to avoid overvoltage.
Emergency shutdown of panel power is mandatory in NJ.
It is convenient before working on the wires.
Placement
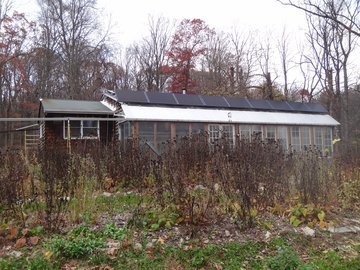
Panels tilted 45 degrees, about optimal spring/fall intake.
This is about 27 degrees away from the roof: gives access to wiring, and its safer to clear snow.
ComboBox

Brought inside to monitor four string performance with amp meters.
Each string is a series of three panels, all voltages are the same (could do with one volt meter)
It has breakers (overcurrent protection), and two Surge Protector Devices (right side, one SPD serves two strings).
The SPD helps reduce voltage spikes from nearby lightning strikes.
We installed extra SPDs on the breakerbox (surge may come from well side) and the external power source.
Mixing panels
When adding panels over time, usually the specs differ.
Basically the lowest optimum amps in a string limits the total string amps,
and the lowest voltage of any string limit the other string voltage.
Multiply optimum amps and voltage to find the optimum power production,
Multiply the lesser amp for each seperate string by the lowest string voltage to find the resulting optimum production.
That shows the loss in efficiency.
For more info see https://solarpanelsvenue.com/mixing-solar-panels/
Power management
On a normal sunny day, the battery may fill up to reach absorption (limiting battery charge and PV intake),
and go into float: no PV intake the rest of the day, regardless of use.
To reduce this PV power rejection, we use the programmable MPPT relay to divert power to the boiler.
Usually we have hot water from PV surplus, in winter mostly from the mason stove .
Note: MPPT (maximum power point tracker) optimizes power intake, since
panels have their optimum production at a different voltage from the battery.
Big loads
Welding is "noisy", an EMI filter helps but we still have chatter in the washing machine.
So i turn that breaker off when welding.
A 3.7kW portable saw mill did not startup on splitphase (2*120= 240V).
Installed a 5kW three phase motor and a 7.5kW inverter (single phase 240V input, three phase 240V output).
Default set to start and stop slow, works well.
We use some NTC (negative temparature coefficient)/ICL (Inrush Current Limiters) to ease
startup of the mitersaw. A split second delay makes a big difference.
back to index
Strawbale
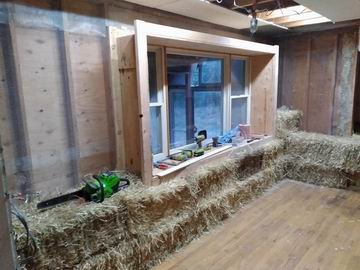
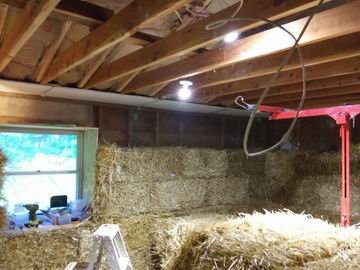
Straw bales have an insulation value of R35-R50, depending on the bale size and the direction that
they are stacked. Removed nails from existing sheetrock (magnet and mini crowbar).
Reused lotsa sheetrock in 20" wide strips to cover doubled roofbeams (with doubled insulation).
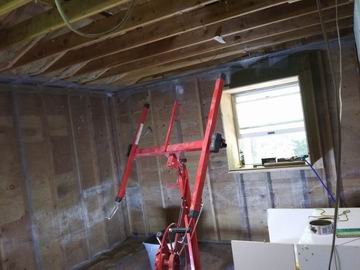
Drilled 1/2" ventholes in the ring beam along the exterior walls to allow the bales to breathe dry.
Stapled 1/4†landscape cloth (galvi mesh) against the studs against mice.
Installed wood bucks for windows (16"deep), wrapped mesh around edges (stapling in place)
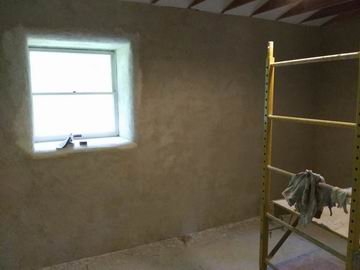
Lime plaster mix: 1 part water, 1 part hydrated lime, 3 parts sand, 1-2 handfuls of chopped straw.
Chopped straw with a weedwacker in a bin.
Plastered the back sides of the bales and stacked the bales against the mesh.
Anchored the bales to the studs using landscape pins in the bales and wire screwed to the studs.
Leveled with weedwacker before plastering.
Plastered two coats with straw fiber, and a final without fibers.
back to index
Thoughts
Why you bring so much stuff (2 backpacks for half year on the lake),
you only need three things: something for your stomach,
a place to sleep and a friend to talk to (Leblanc)
No roses without shite.
Life- delay of energy decay (less waste- more life)
No macrobes without microbes.
Soil is live- none exist without it:
we reconnect the easy way or the hard way.
Nothing is impossible for those who dont have to do it themselves.
Memory is good, but short.
Share goes around, keep ends in the ground.
Getting older is becoming who you always were supposed to be (D.B.)
Comfort kills
Like teens who discovered the booze and the money, now it's time to wake up before it's gone.
Find a way or make a way
And the land was there, waiting to be understood
No strength without resistance
back to index
Weeds
are in the eye of the beholder
If you can't beat em, eat em (we ate dandilion, nettle, plantain, dock... check local foraging info)
Japanese barberry we pull root and all with our tool.
Use perennial cover (clover), bush (elderberry).
Put down carton and cover with 8"mulch.
Wood chips cause a nitrogen shortage (reduces weeds) but mycelium and worms love it.
back to index
Questions/ remarks: email info@homestead101.net